ストリーム OBS で YouTube チャットを表示するにはどうすればいいですか?

YouTubeのライブストリーミングは、もはや単に動画を放送するだけではありません。 リアルタイムのインタラクション ライブチャットは視聴者が反応したり、質問したり、ストリーマーと直接交流したりする場であり、ライブ配信の成功には欠かせない要素です。YouTubeチャットを配信に直接表示することで、視聴者は参加意識を持ち、特にゲームプレイ配信、チュートリアル、ポッドキャスト、ライブディスカッションなどで、より多くの交流を促せます。
OBS Studioは、配信と録画に最も人気の無料ツールの一つですが、多くの初心者が共通の疑問に悩まされています。それは、OBSで配信中にYouTubeチャットを表示する方法です。OBSは高機能ですが、特にブラウザソース、埋め込み、レイアウト調整などを扱う際には、最初は設定が難しく感じるかもしれません。
この記事では、OBS を使用して YouTube チャットをストリームに表示する方法について詳しく説明します。その後、チャット付きの YouTube ストリームを簡単に録画したいユーザー向けに、よりシンプルな代替手段を紹介します。
1. Stream OBS で YouTube チャットを表示するにはどうすればいいですか?
OBSストリームでYouTubeライブチャットを表示するには、通常、チャットを ブラウザソース 以下はストリーマーが使用する最も信頼性の高い方法です。
方法1:YouTubeチャットをブラウザソースとして追加する
これは最も簡単で、最も広く使用されている方法です。
手順:
- YouTube Studio にアクセス → コンテンツ → ライブ ライブストリームを開始またはスケジュールします
- ストリームダッシュボードでライブチャットを見つけて、3つのドット(⋮)をクリックします→ ポップアウトチャット ポップアウトチャットウィンドウで、アドレスバーからURLをコピーします
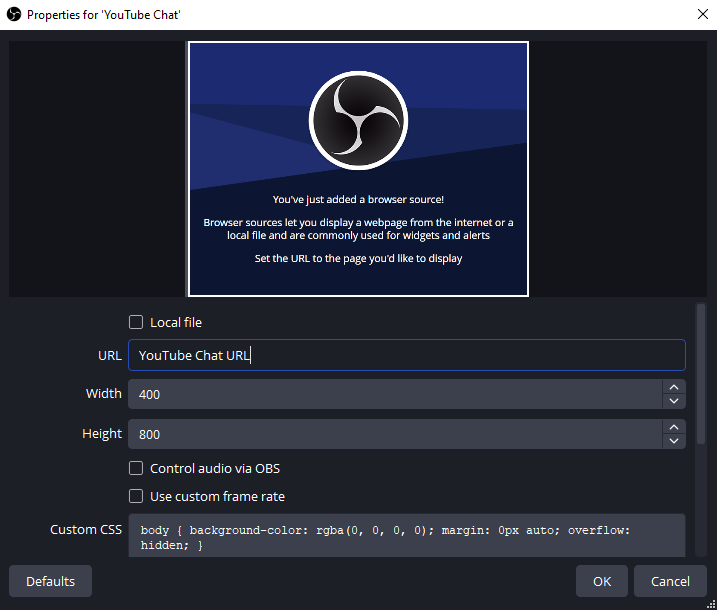
- OBS Studioを開く→ 出典 、 クリック + → ブラウザ
- 名前を付ける(例:YouTube Chat)→ チャットURLを貼り付ける→ サイズを設定(推奨):幅:400、高さ:800→ クリック わかりました 。
- チャットは、OBS プレビューに移動可能なオーバーレイとして表示されます。
方法2:YouTubeチャット埋め込みリンクを使用する
この方法は、よりきれいなレイアウトやより詳細な制御が必要な場合に便利です。
手順:
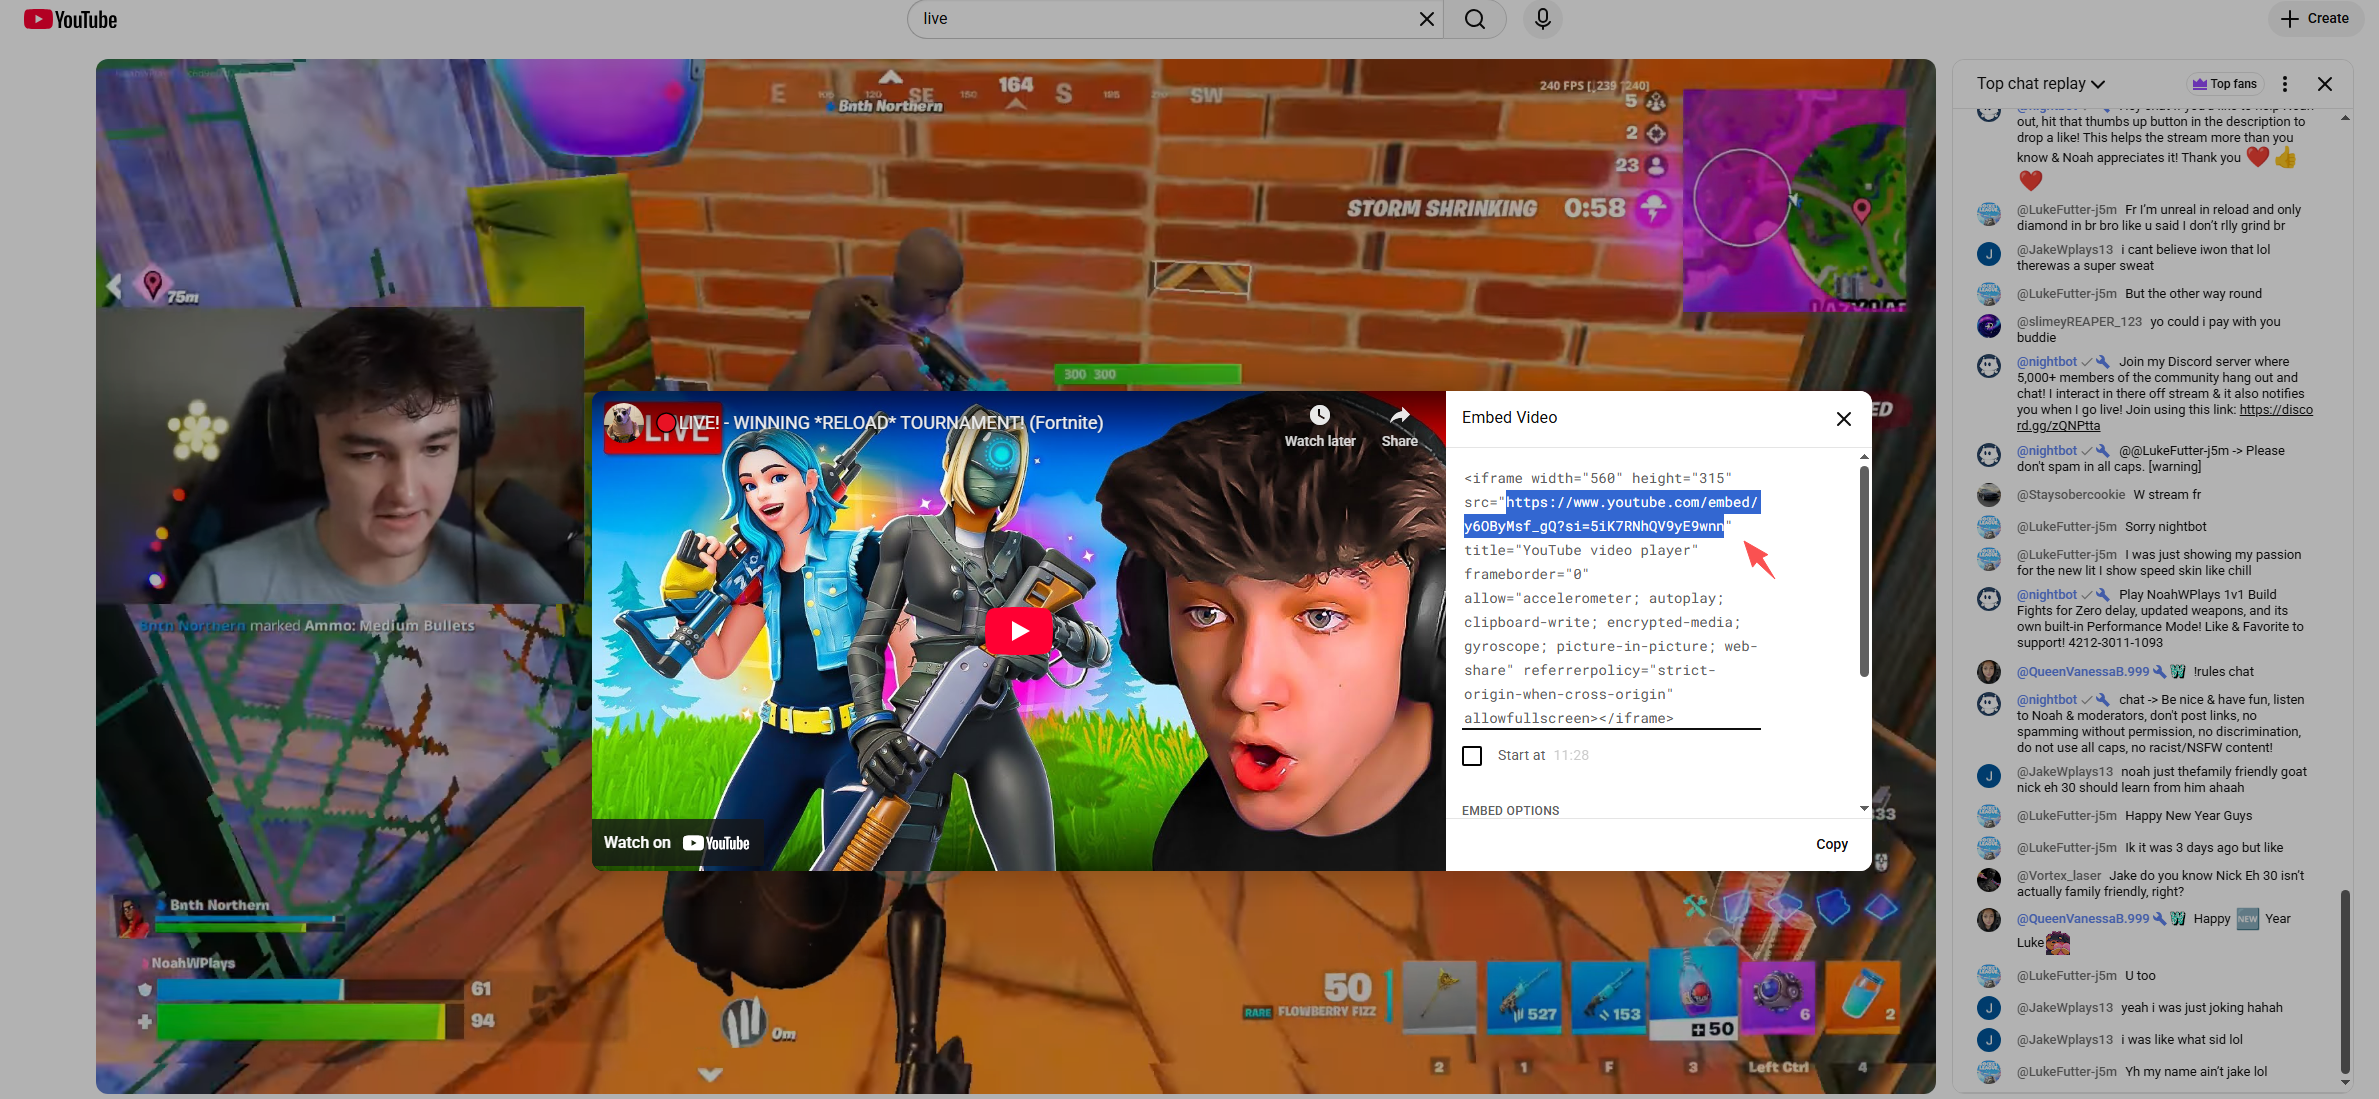
- YouTubeライブ動画ページを開きます
- クリック 共有 → 埋め込み
- iframeコードをコピーする
- 抽出する
srciframeからのURL - そのURLをOBSに貼り付けます ブラウザソース
次のようなパラメータを追加して外観をカスタマイズできます。
&dark_theme=1ダークモード用
方法3:サードパーティのチャットオーバーレイサービスを使用する
アニメーションメッセージ、絵文字、視覚効果が必要な場合は、サードパーティ製のツールが適しています。
人気のあるオプションは次のとおりです。
- ストリームラボ
- ストリーム要素
- チャットをリストリーム
一般的な手順:
- オーバーレイサービスにサインインする
- YouTubeアカウントを接続する
- 有効にする チャットオーバーレイウィジェット
- 提供されたオーバーレイURLをコピーします
- OBSに以下を追加する ブラウザソース
これらのツールは、手動でスタイルを設定せずにプロフェッショナルなチャットアニメーションを作成したいストリーマーに最適です。
チャットオーバーレイの推奨OBS設定
一般的な問題を回避するには、OBS で次のブラウザ ソース設定を調整します。
- 見えない場合はソースをシャットダウンする : オフ
- シーンがアクティブになったらブラウザを更新します : の上
- FPS : 30
透明な背景用のオプションのカスタム CSS:
体 {
背景色: rgba(0, 0, 0, 0);
}
2. よくある問題と解決策
チャットが表示されない
- ストリームが実際にライブであることを確認してください
- ビデオ URL ではなく、ポップアウト チャット URL を使用してください。
- ブラウザソースを更新する
チャットが切断される
- ブラウザソースの幅を広げる
- 変換をチェック→変換をリセット
黒または白の背景
- カスタムCSSを有効にする
- URL でダークテーマパラメータを使用する
3. OBSのシンプルな代替手段を試して、チャット付きのYouTubeを録画しましょう – Swyshare Recordit
OBS は強力ですが、特にチュートリアル、リアクション、インタビュー、ライブイベントのアーカイブなど、チャットを表示したまま YouTube ストリームを録画したいだけのユーザーにとっては、手に負えないと感じるかもしれません。
ここは Swyshare Recordit シンプルで効率的な代替手段として際立っています。 Swyshare Recordit は、複雑な設定なしで、ビデオ、システムオーディオ、マイク入力、画面上のコンテンツをキャプチャしたいユーザー向けに設計されたオールインワンの画面録画ソリューションです。OBSとは異なり、 Recordit シーン、ソース、ブラウザ埋め込みは必要ありません。
の主な利点 Recordit 含む:
- ワンクリック録画 - シーン設定不要
- YouTube動画をキャプチャしてライブチャットを一緒に行う
- 全画面、ウィンドウ、またはカスタム領域を録画します
- システムオーディオ + マイクのサポート
- スクリーンショットと基本的な編集ツールが組み込まれています
- 初心者に優しいインターフェース
チャット付きYouTubeを録画する方法 Recordit :
- ダウンロードしてインストールする Swyshare Recordit WindowsまたはMac
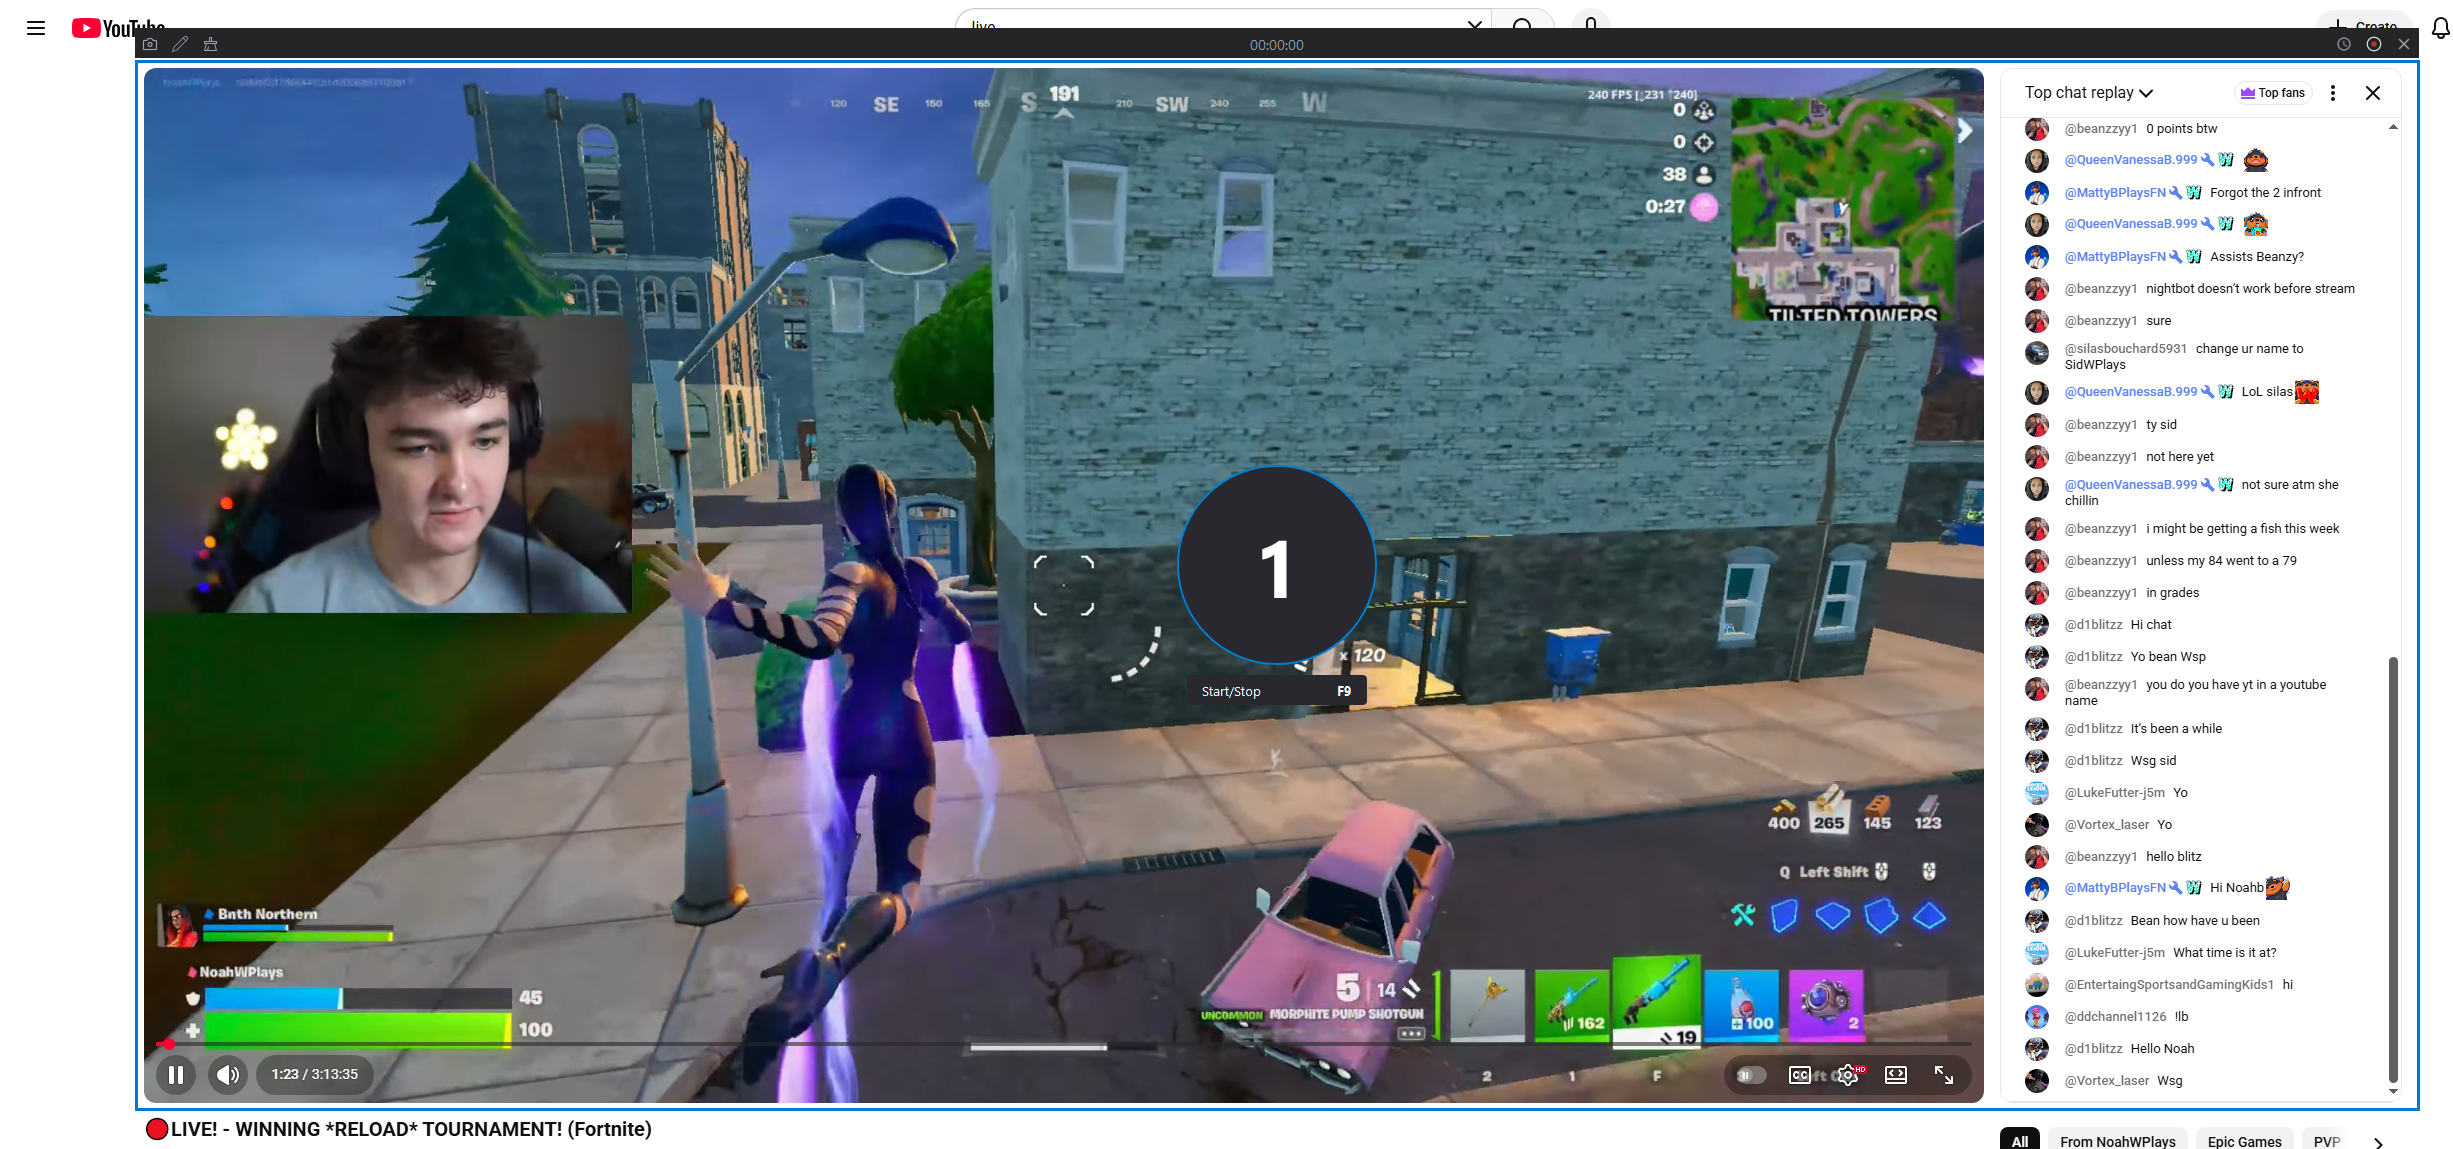
- YouTubeのライブストリームまたはリプレイを開き、ライブチャットが画面に表示されていることを確認します。
- 打ち上げ Recordit 録音領域を選択し、システムサウンド(必要に応じてマイクも)をオンにします。
- 「録画の開始」をクリックすると、チャット付きの YouTube ライブの録画が開始されます。
- 終了したら録画を停止し、「ファイル」タブで録画したビデオを見つけます。
4. OBSと Recordit : どれを選ぶべきでしょうか?
| 特徴 | OBSスタジオ | Swyshare Recordit |
|---|---|---|
| 学習曲線 | 急な | とても簡単 |
| チャットの設定 | マニュアル | 自動(画面上) |
| ライブストリーミング | はい | いいえ |
| チャットで録音 | 複雑な | ワンクリック |
| 最適な用途 | ストリーマー | クリエイター、教育者、レビュアー |
5。結論
OBSを使用して配信中にYouTubeチャットを表示すると、視聴者のエンゲージメントが向上し、コンテンツのインタラクティブ性が向上します。OBSブラウザソース、埋め込みチャットリンク、サードパーティ製オーバーレイを使用することで、ライブチャットを配信に完全に統合し、プロフェッショナルな仕上がりを実現できます。
しかし、OBSは必ずしもすべての人にとって最適なソリューションではありません。技術的な設定を気にせず、主にYouTube動画やチャット付きのライブ配信を録画したいのであれば、 Swyshare Recordit スマートで効率的な代替手段です。そのシンプルさ、信頼性、そして画面ベースの録画アプローチは、スピードと使いやすさを重視するクリエイターにとって理想的です。
ライブストリーミングの場合 → OBS
チャット付きのYouTube録画について→
Swyshare
Recordit